GeneralHacking

Arduino Gamepack costruisci da solo il tuo Gameboy Open Source

« Older   Newer »
  Share  
DarkHero02
view post Posted on 24/7/2011, 19:30


game_boy_open_source

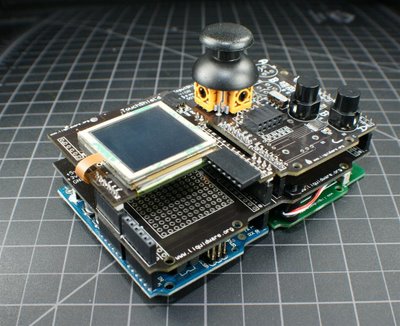
Il Game Boy, l’idolo dei ragazzini degli anni ’80 e ’90, la prima sorta di console tascabile. Ore e ore passate a consumarlo. C’è qualcuno che, ancora nostalgico dei vecchi ricordi, ha deciso di utilizzare Arduino per creare un Game Boy Open source. In realtà il dispositivo è leggermente più piccolo di un Game Boy, ma è particolarmente interessante perché utilizza Arduino come core.

Il progetto Arduino prevede la realizzazione di un Game Boy open source

Di seguito vengono mostrate alcune foto del Gamepack.

Little_GamePack_handheld

Handheld_size

Light+looking+at+the+GamePack

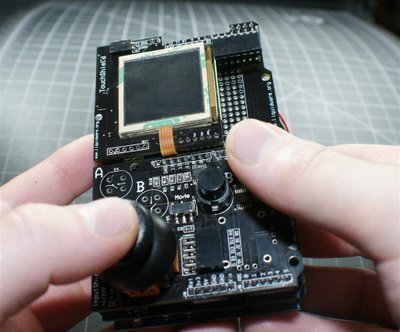
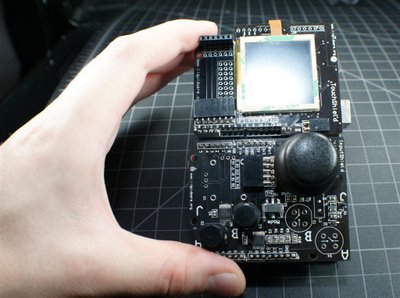
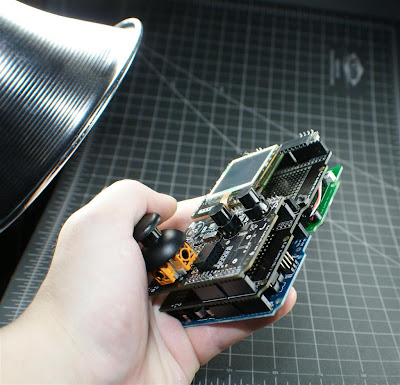
Il video successivo mostra invece il risultato ottenuto una volta che tutto è stato sistemato e pronto ad essere eseguito; il codice sorgente che gira su Arduino è quello che vedete riportato dopo il video.


CODICE
#include
#define RXPIN 3
#define TXPIN 2
AFSoftSerial mySerial = AFSoftSerial(RXPIN, TXPIN);
unsigned char x=0;
void setup()
{
mySerial.begin(9600);

/* Sync up by waiting for character */
while(mySerial.read() != 'U');
}

void loop()
{
/* The first analog pin sent */
x=0;

/* send 6 Analog Pin values */
while (x <>
{
serial_sendAnalog(x);
x++;
}
delay(10);
x=0;
while(x<>
{
serial_sendDigital(x);
x++;
}
delay(100);
}
void serial_sendDigital(unsigned char digitalPin)
{

if ( (digitalPin <> 13) )
return;

mySerial.print((unsigned char)digitalRead(digitalPin));
delay(2);

}

void serial_sendAnalog(unsigned char analogPin)
{
unsigned char lowByte, highByte;
unsigned int val;

/* Pin number range check */
if (analogPin > 6)
return;

/* Get the value */
val = analogRead(analogPin);

/* Separate the value into 2 bytes */
lowByte = (unsigned char)val;
highByte = (unsigned char)(val >> 8);

/* Send the high byte */
mySerial.print(highByte);

/* Write delay */
delay(1);

/* Send the low byte */
mySerial.print(lowByte);

/* Write delay */
delay(1);
}


E questa è la parte che gira suTouchShield:

CODICE
COLOR green = { 0, 255, 0 };
COLOR blue = {0,0,255};
COLOR yellow = {255,255,0};
COLOR black = {0,0,0};
COLOR white = {255,255,255};
COLOR grey = {0x77,0x77,0x77};
COLOR red = {255,0,0};
POINT my_point;
unsigned int analogValues[6];
unsigned char digitalValues[10];
LCD_RECT digitalRect = { 118, 15, 127, 115 };
LCD_RECT analogRect = {0, 60, 32, 121 };
unsigned char x;
void setup()
{
Serial.begin(9600);
delay(3000);
/* The sync character */
Serial.print('U');
}
unsigned int oldx, oldy, newx, newy;
int erasemode = 2;
int pencolor = 1;

void loop()
{
//digitalValues[0] - digital pin 4, button A MODEA
//digitalValues[1] - digital pin 5, button B MODEA
//digitalValues[4] - digital pin 8, button A MODEB
//digitalValues[5] - digital pin 9, button B MODEB
//analogValues[5] - joystick y, MODEA
//analogValues[4] - joystick x, MODEA
//analogValues[3] - joystick y, MODEB
//analogValues[2] - joystick x, MODEB

//Read analog values
analogValues[0] = (Serial.read() <
<>
analogValues[1] = (Serial.read() <
<>
analogValues[2] = (Serial.read() <
<>
analogValues[3] = (Serial.read() <
<>
analogValues[4] = (Serial.read() <
<>
analogValues[5] = (Serial.read() <
<>
//Read digital values:
//Read digital values
digitalValues[0] = Serial.read();
digitalValues[1] = Serial.read();
digitalValues[2] = Serial.read();
digitalValues[3] = Serial.read();
digitalValues[4] = Serial.read();
digitalValues[5] = Serial.read();
digitalValues[6] = Serial.read();
digitalValues[7] = Serial.read();
digitalValues[8] = Serial.read();
digitalValues[9] = Serial.read();

if (touch_get_cursor(&my_point)) {
lcd_clearScreen( black);
}

newx=3+(1023-analogValues[5])*.12;
newy=3+(1023-analogValues[4])*.12;

if (erasemode && ((oldx != newx) (oldy != newy))) {
lcd_circle(oldx,oldy,5, black, black);
}
if (pencolor == 1) {
lcd_circle(newx,newy,5, blue, blue);
} else if (pencolor == 2) {
lcd_circle(newx,newy,5, green, green);
} else if (pencolor == 3) {
lcd_circle(newx,newy,5, red, red);
} else {
lcd_circle(newx,newy,5, white, white);
}

if (!digitalValues[0]) {
erasemode = !erasemode;
}

if (!digitalValues[1]) {
pencolor++;
if (pencolor == 5) {
pencolor = 1;
}
}

oldx=newx;
oldy=newy;
}


Link per comprare il Kit
Al momento costa $272.93.

Fonte: http://it.emcelettronica.com/open-source-g...boy-con-arduino
 
Top
0 replies since 24/7/2011, 19:30   638 views
  Share